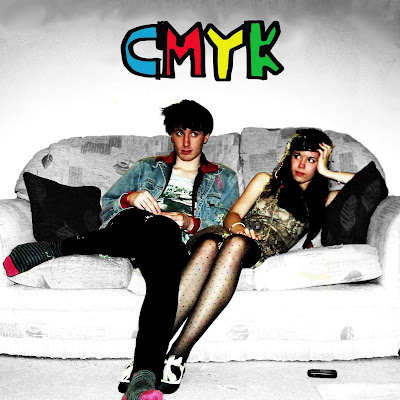
 Firstly I edited the image itself by changing it to black and white. I then erased the black and white layer with the erase tool around the band so they are still in colour which makes them stand out. I used the Clone Stamp and Blur tool to get rid of the photo frames at the top of the photo to make the image look neater. Whilst editing the image I changed the saturation to make the colours brighter and the curves tool to increase the contrast so the band stood out further.
  I then added my band name and logo which is CMYK. I chose this as I still wanted a four-lettered name to follow the primary colour scheme I had and CMYK stands for the four colors (cyan, magenta, yellow and black) which are used for printing so it co-insides with the colour theme. I downloaded the font 'Yo La Tengo' from www.dafont.com. I chose this font as it looks hand drawn and childlike which represents the band as childlike and fun themselves. It also shows they don't take themselves too seriously as say an italic font would connotate.
I made my back cover in the similar way by but kept the whole image black and white so the bright coloured text would stand out. To keep the digipak consistent I have used the same font and colour scheme. To follow conventions I have the track listing as the main focus and included a record company logo, bar code, websites and copyright details which make it look genuine.

I made the spines simple as possible and used parts of the same images from the front and back cover which I cropped out so that the they linked together. For the main spine I pasted a smaller version of the band logo and a quick record company logo I made myself.


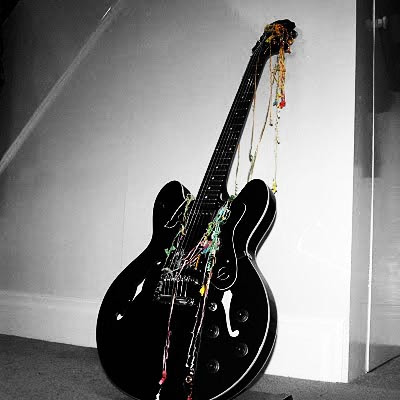
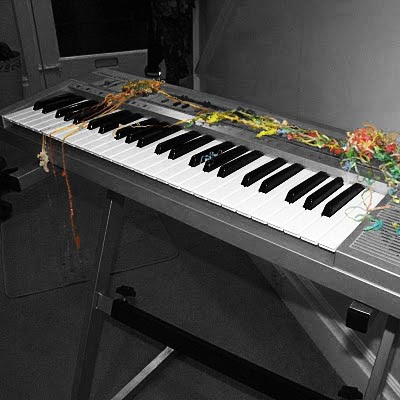
I edited the two images which will be placed behind the disc in the same way as the front cover using the erase tool to keep certain parts of the image in colour. Again I used saturation and curves to improve the picture quality and make the colour further stand out.


No comments:
Post a Comment